So you just bought a new Thunder Laser? This guide will help get you up and running. We will cover topics that you should complete Before the machine arrives and After the machine arrives.
IT Consideration. If you plan to operate your laser in an environment with IT controls (School, Business, Military etc) it would be good to review this article about IT considerations to get ahead of any issues that may arise from an IT standpoint. --IT Considerations for Installing your Thunder Laser
Before your machine arrives:
You should take some steps ahead of the arrival of your machine.
Prepare your Space
The following topics will help you decide where to locate your machine and plan out the space for it.
Topic
Reference Image/Link/Video
Machine Sizing and Clearance:
The article below will give you precise dimensions and example layouts for space considerations:
You will need to install the proper electrical service for your machine. Please see the following information about the requirements: Thunder Laser Main Power Requirements
Be very explicit with your electrician. The service is for 120v 20amp. USA Thunder Lasers do not operate and will be damaged by 220v
.
Nova 24 Stand Options:
The Nova 24 is a desktop model that does not have a base. You will need to buy or build a stand for it. Please see this guide for some examples: Nova 24 Stand Options
Prepare your Computer
The following topics will discuss setting up your computer for basic communication to your machine .
Topic
Reference Image/Link/Video
Computer Requirements:
Lightburn will run on Windows 7.0 or later (32 or 64 bit), MacOS 10.11 or later, or 64 bit Linux. LightBurn does not require a powerful computer for most work, though if your designs contain a lot of images, more memory is helpful.
As with most things, a faster computer will make it easier to work with large images or complex vector graphics.
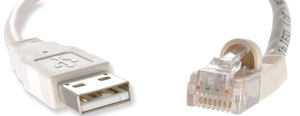
Choose USB or Ethernet Connection:
Ethernet is recommended if available, even if through a USB to Ethernet converter. USB will work fine for Windows (Even with updated driver on MAC, we still suggest ethernet). Ethernet also works better when you have multiple machines with the same controllers. USB is limited in cable length, so you may need an extension that will further weaken the signal.
Down below are the instructions for setting up the USB or Ethernet connections for your computer.
Install Lightburn Trial:
You get 30 days to use Lightburn for free. You can install Lightburn and then create a mock device for your future machine. This will allow you to explore Lightburn and its features in preparation for your machine.
For Macs, if you plan to stick with USB, you will be required to update your FTDI driver or else you may run into incomplete file transfer and communication issues. More information can be found here:
If you decide to use Ethernet, you will need to follow the guides here. Each user's ethernet configuration can be different based on your network setup. More information can be found here: Connecting to LightBurn via Ethernet
Use the guide to pre-plan the IP addresses for your machine and Computers ethernet connection.
Prepare Yourself
Buying a large format, industrial quality Laser machine can be overwhelming and intimidating. We do our best to provide the best resources to prepare you for what's to come. Following our guide will set you up for success and easy your worries. Whether you are transitioning from a non thunder or brand new to lasers we have the tools to make you a proficient user and know your machine inside and out.
The following topics will discuss preparing yourself....this will be one of the most challenging sections but is worth doing.
Decide on a some simple things to start with, especially if this is your first dip of your toe into the Laser World. Purchase some cheap wood\mdf from your local store, maybe some cheap glasses from the dollar store. Knowing that you will need to practice and waste a bit ahead of time will make it easier when you are tossing some of these items.
You can also download a complimentary Thunder Laser file pack to have some graphics to test with on your practice materials. Complimentary Thunder File Pack 1
Prepare for Delivery Day:
Receiving a larger machine is not as easy as a Amazon Box being left by your garage door. One of the most stressful things can be the delivery process. Before you even schedule a delivery day with the Depot, review your own setup. More information and Guidance can be found here: Shipping & Delivery
Spare Parts:
If your machine uptime is critical to your business, spare parts are recommended even when under the warranty period. Shipping logistics have not been consistent for 2 years and nothing is fast or guaranteed. For warranty parts, the goal is to ship USPS priority but larger items may ship via UPS Ground. Expedited shipping is not included in the warranty.
This guide covers many of the initial trip up points for new users when they are setting up and first running their machine. Reviewing these now will help you remember what to do when it is time.
There will be a lot of terms and jargon tossed around here, on Facebook, in webinars etc so it would be good to go ahead and try to learn them. More information can be found here: Laser Terms Glossary
You will need to provide 2 gallons of Distilled water and a method to connect the exhaust hose to the final connection point (Clamp and fittings).
You can find distilled water by the gallon at your local grocery store. Exhaust clamps and a proper exit for your space can be found at your local hardware store or online retailers like Amazon.com.
Things to-do once the machine arrives:
Ok, so now the machine is here and it is GO TIME. Hopefully your thorough review of the above topics has helped you feel comfortable for what comes next.
Time to set the machine in place, level it, install the Chiller, Air Pump and Fan as well as run the exhaust and fill the chiller. After that...time to power up.
(Note that your fan and chiller may look different, same setup still applies)
PLEASE DOUBLE OR TRIPLE CHECK THAT YOUR RECEPTACLE IS NOT 220v. If you power the machine with 220v, it will fry the 36V motor driver power supply, the main contactor and LPSU and it is not covered under warranty.
Now that the machine is set up and ready to run, it is time to power up the machine and do some pre-use checks.
Topic
Reference Image/Link/Video
Main Power Switch:
The Main power switch supplies power to the entire machine. It must be on in order for the Laser Power switch or Chiller Power switch to work
Laser Power Switch:
Powers on the Laser Tube Power supply and the Chiller Power feed
Chiller Power Switch:
Local to the chiller, the switch must be on in order for the chiller to run. Generally, once it is turned on, it is left on. The chiller is then powered off with the Laser Power switch
E-stop Button:
The E-stop button will shut off power to the Main Power Switch which will shut the machine off abruptly.
In order to clear an E-stop, a firm clockwise twist must be applied.
Should your machine not power up, please refer to this guide:
Machine Estop, Machine Breaker, Panel Breaker for feeding the machine receptacle
Pre-Use Checks
These checks are worth doing prior to trying to run a project.
Topic
Reference Image/Link/Video
Air Bubbles in Tube:
Check for Air bubbles in the Laser Tube. After you fill the chiller and then power up the machine (both the Main and Laser Switch) and the Chiller Main Power switch, you will need to inspect the laser tube for air bubbles and take steps to remove them. Small bubbles can be removed by pinching the tubes and a large air bubble on the left side of the tube (nearest the stack light) indicates the Chiller Tubes are reversed.
Clean your Optics:
You should clean your optics prior to test firing your machine for the first time. Here is an article on how to do so. Click the following link(s):
The green buttons on the left side of the machine allow you to test the high and low air assist. You can press each button and adjust each flow valve knob (below button) to make sure air is flowing out of the laser nozzle.
With the chiller on, all doors closed and machine fully set up and checked out it is now time to do a pulse check. Place a piece of material under the nozzle and focus the laser head to 6mm above the material. Closed all the doors and monetarily press the pulse button on the Laser Control Screen to generate a pulse. Look for a pulse burn mark.
Complete the Lightburn Setup
If you had created a mock setup from the above steps, you can use that setup or modify is as needed to finish the setup of Lightburn to get your machine connected. It is recommended to only have 1 device profile per machine so that you are not having to make sure you select the right one each time.
Topic
Reference Image/Link/Video
Check for Latest Version of Lightburn and Bug Fixes:
For G-Code users that already have Lightburn, you must enter a DSP Lightburn Key in order to get Lihgtburn talking to a Thunders Laser with a Ruida controller.
Import Device Profile:
Use the included file on the USB stick to import either a default USB or Ethernet profile.
By importing the profile, it will bring in your Offsets, Preview Parameters and basic settings so you will be able to skip those steps below.
You may need to change the IP from the default 192.168.1.100 to match your network setup.
After you have imported this new device, delete your old unused Trial device.
If you cannot get Lightburn to say 'Ready' instead of disconnected and to find your Ruida Controller, you will need to double check your USB or Ethernet Setup.
You can also try to right click on the "Devices" button in the Lightburn Laser Window to make Lightburn look for your machine. Also if you have created multiple Devices, make sure you have the right one selected in the drop down selection next to the Devices button.
Not Connected:
Connected:
Backup Machine Settings To Computer:
Once Lightburn is communicating with the laser you can backup the machine settings
In Lightburn: Edit>Machine Settings
Let it read the machine settings and then save them to your 'Thunder Lightburn" folder of choice.
Upload Parameters for Lightburn Preview Time Estimate:
(Skip if you used the Easy import)
Once Lightburn is communicating with the laser you perform this step.
This is to help you get better time estimates so you can quote your jobs and manage your workflows better.
Do this before attempting to do any engraves to ensure the best quality output. If you used the Easy Button Import, you do not have to re-enter these values.
Once you enter the offsets, Export them and save them to your "Thunder Lightburn" folder of choice.
Install Materials Library (Optional)
The Library provides a ballpark of settings for common materials. It is not all inclusive and provides good starting points that you will have to adjust based off your exact materials.
You will need to develop a work from. From setting up the project File, prepping the machine to be ready to run and setting up the material on the machine. Each type of job may require some modification to your work flow.
An example of a simplified workflow:
Picking your art work Vector vs Image and Design in Lightburn
Setting up your Layer Types, Speeds and Powers
Preview the artwork in Lightburn
Set up origin in Lightburn. Absolute, User or Current Position
Send Job to the laser
Aligning your material
Setting your origin at Machine based on Lightburn Origin Setup
Focus... Auto/Manual
Lets get the party started - Pressing the start button
Material Test File Cards:
These files are a great way to find the settings for your specific materials. Run the file as is and check the results
Great group to gather tips and tricks, material suggestions and ideas. It is not recommended to get your Tech support from the Facebook Group. Thunder Laser Global Facebook Group
Lightburn Forum:
If you have Lightburn specific things, the forum may be a good spot to look. Just note, that Lightburn covers many different machines so there may be topics that are not applicable to your Thunder Laser. Lightburn Help Forum
Bi-Weekly Thunder Webinar
Join use every other Thursday for a Webinar, its free and fun.
Introduction: So you just bought a new Thunder Laser? This guide will help get you up and running. We will cover topics that you should complete Before the machine arrives and After the machine arrives. Safety First: For safety information, please ...
ODIN Series Getting Started Introduction: So you just bought a new Thunder Laser? This guide will help get you up and running. We will cover topics that you should complete Before the machine arrives and After the machine arrives. Some of the videos ...
Bolt Series Getting Started Introduction: So you just bought a new Thunder Laser? This guide will help get you up and running. We will cover topics that you should complete Before the machine arrives and After the machine arrives. Some of the videos ...
***This article is a work in progress, we are working to complete all the Coming Soon items. If you have a specific question or need, please email us at support@thunderlaserusa.com *** Introduction: So you just bought a new Thunder Laser Titan? This ...
Welcome and congratulations on your New Thunder Laser purchase! Please use this article as a home-base article for your journey. Here is a table of Links to guides, tutorial and videos to get you going: Click the three dots to open the menu of all ...
If you are a Thunder Laser USA client and still need Technical Support after exhausting the resources in the Knowledge Base, simply email support@thunderlaserusa.com and the Technical Support Team will promptly assist you! You can also use the form here.
Information contained in this Knowledgebase, on this page, in this or any other Article etc. is the property of Thunder Laser USA and shall not be copied, re-used, sold etc. Do not copy, distribute, or reproduce without express written permission from Thunder Laser USA.