Thunder Laser Easy Button for Device Profile Imports to get - Offsets, Basic Settings, Additional Settings, and Device Profile Settings
Preface: This article covers how to import your device Profile using the Thunder Laser supplied file on the USB stick included with the machine that is being implemented in Q2-Q3 of 2023 and is applicable to Nova, Odin and Bolt series lasers.

Note: This new method will make it a lot easier to import and be successful at setting up your laser. With that, it is still a good idea to read this guide to understand what it DOES do and what it does NOT do for you. Every user will have a unique situation and may need to adjust the settings for the IP configuration or Start Delay as examples. Understanding what is automatically set up will still help you know where to go if you need to change something.
Quick Start Video:
Complete Guide:
What does this File import accomplish
|
What does this File import NOT do
|
|
-Creates a USB or Ethernet Device (you pick the file for the connection type you want to use) -Imports your machine specific Scanning Offsets in mm and enables them
-Disables the Start button in Lightburn
-Sets a 5 second Start Delay for the Exhaust fan to ramp up
-Disables the Z motion for the device
-Updates the "Additional Settings" for the preview time Accuracy
|
-It does not setup an IP address that is custom fit to your network. It sets up the DEFAULT IP of 192.168.1.100 which is the default IP of the laser machine. You will still need to configure your computers Ethernet Connection and possibly even change the IP to fit your specific network layout
-It does not change the USER settings\Preferences. You will still want to adjust to your liking
-It does not UPDATE the file on the USB if you change anything, you will need to re-export your device Profile if you make modifications
-It does not install the FTDI driver for USB communications
-It does not do a Camera Calibration
|
How to import the LBDEV file:
You will need to find your Thunder USB stick and plug it into your computer:
Start out by getting Lightburn ready to import a file:
|
New Lightburn without an Existing Device
|
With Existing Lightburn Device(s)
|
|
If you are starting out with a fresh copy of Lightburn and do not have any devices, You will be prompted to create a device when you open up Lightburn.
Press the Import button to start the import of the device profile file
|
(If you have created "dummy devices" for the trial that are not what you will be using, delete them) |
Select the file to import:
After you have clicked the Import button, navigate to the folder show on the Thunder USB stick that was included with the machine. Note that your drive letter may not be I: and if importing for a Odin, go to the ODIN Series folder, and for Bolt, go to Thunder Bolt folders.Select the *.lbdev file you want to import, whether you want USB or Enet (ethernet). Click "open". In this example the file selected was Nova24_2329798_enet.lbdev. (Note that your computer may not show the .LBDEV file extension, that is ok)
 Alternate file path: The *.lbdev File may be under the folder \Communication Setting for Lightburn
|
Windows Example
|
Mac Example
|
|
|
Use finder to navigate to the USB stick files and select the appropriate file
|
The Device will import into Lightburn:Click OK
Check what was imported for your Device Profile:
In Lightburn, Select edit>device settings to pull up the Device Settings window or the icon that looks like a Wrench and Screwdriver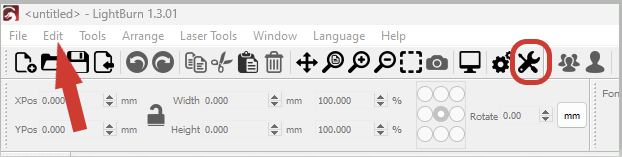
|
Basic Settings
|
Reference Image
|
|
|
|
Additional Settings
|
Reference Image
|
|
|
If you have any issues or suggestions please email support@ThunderLaserUSA.com
Related Articles
Thunder Laser USA Easy Button for Lightburn Device Profile Imports for Aurora series Laser
Preface: This article covers how to import your device Profile using the Thunder Laser supplied file on the USB stick included with the machine that is being implemented in Q4 2024 and is applicable to Aurora series lasers. Not all USB sticks will ...Thunder Bolt Series Getting Started
Bolt Series Getting Started Introduction: So you just bought a new Thunder Laser? This guide will help get you up and running. We will cover topics that you should complete Before the machine arrives and After the machine arrives. Some of the videos ...New Computer: How to transfer your settings and get connected back to your Thunder Laser with Lightburn
Overview Bought a new computer because the old one died or slowed down? The most common panic we see is a customer swapping machines, opening LightBurn on the new PC, and finding all their settings gone and the laser showing “Disconnected.” The good ...LightBurn mock Device profile setup for Nova, ODIN, Aurora and Bolt Setup
Preface: This article will walk you through a mock device setup so you can emulate a Thunder Laser in your Lightburn trial. In order to import the premade device profiles, you must have the proper Lighburn License (DSP or Galvo) or a trial started ...Thunder Laser Scanning Offset Adjustment
Preface: This article covers how to enter your scanning offsets properly and some steps to troubleshoot what went wrong and where to find your offsets if you lose the gold card. If you have a new machine that was built and shipped around Q2 2023 or ...
If you are a Thunder Laser USA client and still need Technical Support after exhausting the resources in the Knowledge Base, simply email support@thunderlaserusa.com and the Technical Support Team will promptly assist you! You can also use the form here.
Information contained in this Knowledgebase, on this page, in this or any other Article etc. is the property of Thunder Laser USA and shall not be copied, re-used, sold etc. Do not copy, distribute, or reproduce without express written permission from Thunder Laser USA.