Bolt and Odin: Lens Selection and Comparison
Preface: This article covers the difference between the Four Lens options for the Odin series machines. The same principles apply to the Bolt as well.
Intro Video:
The Four Lens Options Side by Side:
Engraving Test:
The same picture was engraved with all four lens with the same power speed with the picture parameters set as shown:
Speed: 1500mm/s
Power: 30%
Picture mode: Halftone
Cells per inch: 90
Comparisons:
1.5 inch lens:
The 1.5″ lens has the smallest burn dot to provide the most detailed engraving effect. But at the same time it has the shortest cutting thickness
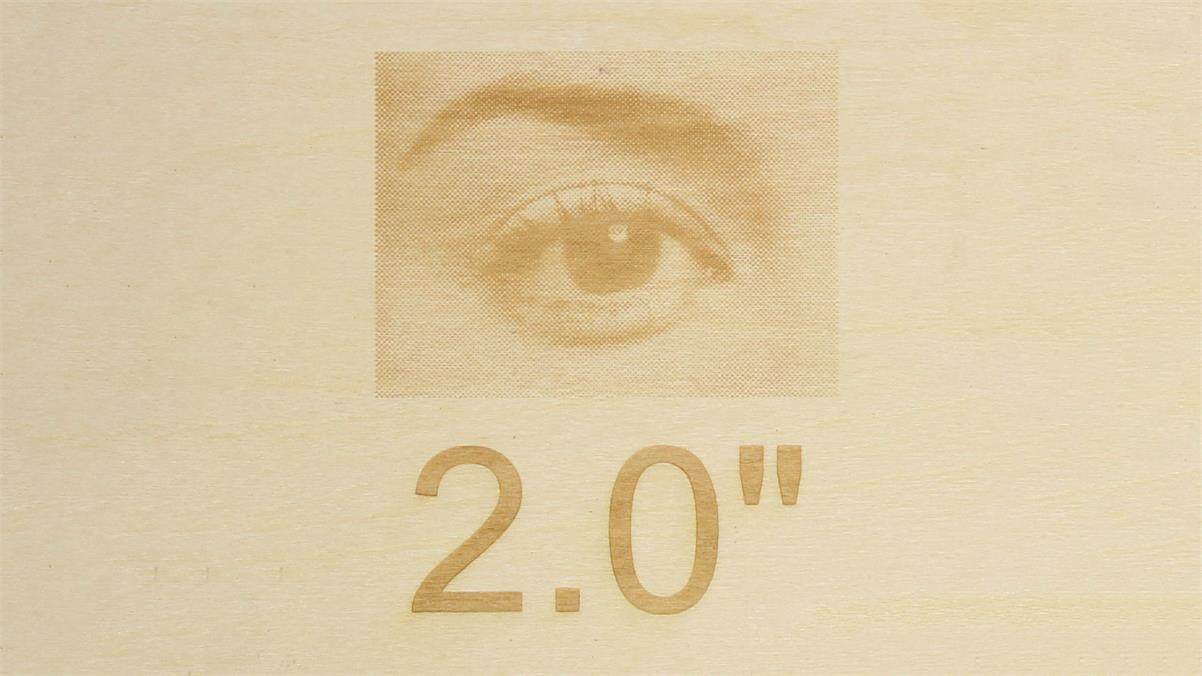
2.0 inch lens:
The thickness of the 2.0″ lens cuts and the engraving effect are well balanced for most cases
2.5 inch lens:
The 2.5″ lens is ideal for thicker materials that require engraving and cutting
4.0 inch lens:
4.0″ lens engraving fidelity is not as good as other lenses but it is meant for cutting thicker materials
Dot Spacing Comparison:
When we have finished engraving all the images, we can then use a magnifying glass to compare the size of the burn dots engraved by each lens
Lens Selection based on Engraving and Cutting needs:
Fineness of engraving:
1.5″ better than 2.0″ better than 2.5″ better than 4. 0″
Depth of cut:
4.0″ better than 2.5″ better than 2.0″ better than 1.5″
Related Articles
Thunder Laser Working Space Comparison for Gantry Laser (Nova, Odin and Bolt) for X Y and Z Axes
Preface: This article covers the working space sizes for the Thunder Laser Gantry lasers. Information was gathered from published data. This is for visualization only and the scaling of the images may not accurately reflect exact dimensional sizes. X ...Thunder Laser Bolt and Odin Lens Kit assembly Guide
Preface: This article covers how each of the 4 lens kits should be assembled so that they fit in the laser head properly.Thunder Laser Bolt and Bolt Plus Unified User's Manual
Please see the manual for the Thunder Bolt and Bolt Plus below. Note that the manual is Windows and RDworks centric due to being the GLOBAL manual. Thunder Laser USA has compiled information on Lightburn, Windows and MacOS in this knowledgebase that ...The Usual Suspects and Preparing For Your 1 Hr. Training
Preface: The Usual Suspects are the things that most commonly get overlooked or are incorrect that can burn up training time on things that should already be checked and if not mastered. If you choose to not follow this guide you will likely ...Thunder Laser Beam Spot Size based on Tube and Source Wattage
This data is assuming all stock machines with proper optics/alignment/focus... etc...dot size will also increase with power output. Nova Series Nova Plus Bolt Titan Odin Aurora Nova Series The Nova series machines have DC excited watercooled glass ...
If you are a Thunder Laser USA client and still need Technical Support after exhausting the resources in the Knowledge Base, simply email support@thunderlaserusa.com and the Technical Support Team will promptly assist you! You can also use the form here.
Information contained in this Knowledgebase, on this page, in this or any other Article etc. is the property of Thunder Laser USA and shall not be copied, re-used, sold etc. Do not copy, distribute, or reproduce without express written permission from Thunder Laser USA.