How to adjust the 48V 30W RF Tube Power Supply Voltage for a Thunder Laser Bolt
Preface: This article covers how to adjust the 48V power supply voltage for the Thunder Bolt DC 30W RF tube. Power must be on the machine and the Laser must complete the startup sequence.

This procedure requires work to be done near live voltage. Take proper precautions.
Quickstart Video:
Complete Guide:
Tools you will need:
Multimeter
P1 Phillips Head Screw Driver
Doorlatch Key
Procedure:
1. Locate the Power SupplyYou will need to access the back of the Thunder Bolt Laser where the LPSU and Tube are. Unlock and unlatch the two latches that keep the tube door closed
Unlock and Unlatch the Rear Door
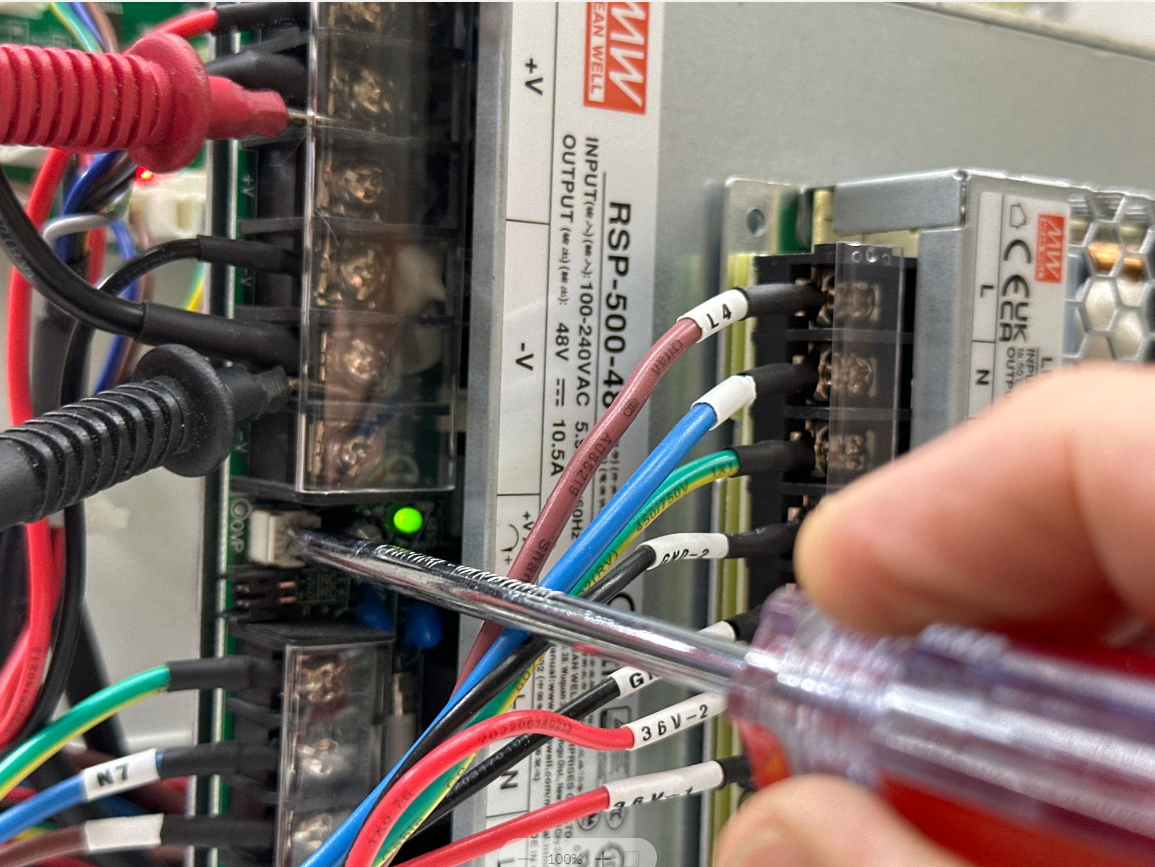
2. Observe the Power Supply
The power supply is on the left side of the back of the machine. It should have a green Light on it to indicate the it is On and Outputting. Take note of the terminals and devices pointed out below
3. Measure the Output and Adjust
Use the multimeter to measure the DC output on the V+ and V- terminals. Use the screwdriver on the Trim Pot to adjust the voltage. Small turns clockwise to increase, Small Turns counter=clockwise to decrease.
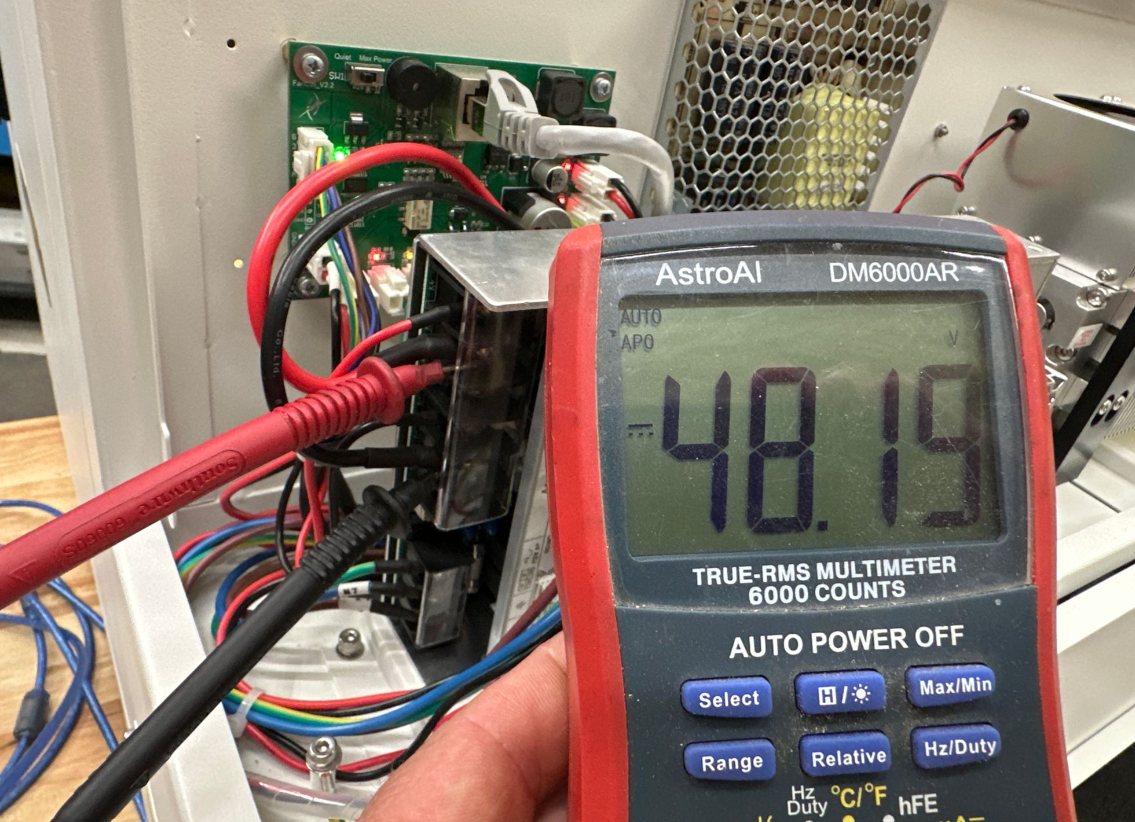
Adjust the voltage until it is between 47 and 49 VDC. Try to get closer to 48V if possible.
Reference Articles:
Related Articles
Thunder Laser Bolt and Bolt Plus Unified User's Manual
Please see the manual for the Thunder Bolt and Bolt Plus below. Note that the manual is Windows and RDworks centric due to being the GLOBAL manual. Thunder Laser USA has compiled information on Lightburn, Windows and MacOS in this knowledgebase that ...How to Clean RF Tube Air Filters on a Thunder Laser Bolt and Odin Series machines
Preface: This article covers how to clean your air filters for your RF Tube on your Thunder Laser Bolt and Odin Machine While performing this work, the machine should be powered off. Do not run your machine without the filters installed. Quickstart ...Thunder Bolt Troubleshooting guide for having an Alarm Messege on the Screen
***This article is a work in progress as we coordinate translations and clarity of the message, please be patient*** Below is a list of warning messages that may appear on the screen of your Thunder Bolt Machine 1、 Warning while trying to Frame or ...NOVA series How To replace the 24VDC Controls Power Supply
This article covers how to replace the 24V Power supply that powers the controls for your NOVA machine. Note that this was done on a NOVA35. Larger Machines like the NOVA63 will have this Power Supply by it self not hidden by the 36V power supply. ...Thunder Laser Main Power Requirements
Preface: This article covers the main power requirements for your Thunder Laser. It is your responsibility to properly install a Local Code Compliant power feed for the machine. Nothing in this guide will supersede a Local Jurisdiction and you should ...
If you are a Thunder Laser USA client and still need Technical Support after exhausting the resources in the Knowledge Base, simply email support@thunderlaserusa.com and the Technical Support Team will promptly assist you! You can also use the form here.
Information contained in this Knowledgebase, on this page, in this or any other Article etc. is the property of Thunder Laser USA and shall not be copied, re-used, sold etc. Do not copy, distribute, or reproduce without express written permission from Thunder Laser USA.