Aurora Laser Won't Turn On - No Power
Preface: This article covers issues related to powering up your Aurora Fiber laser. As you read this article, take note of the Visual indicators to make a judgement call of where power is passing and where it is not.
Please see this article for an Electrical Schematic of the 120V power:
Things to Check:
1. Machine is plugged in at Wall Outlet and at the Socket in the Back of Machine
Check that the machine has not been unplugged from the wall
Check that the Blue plug is secure on the back of the machine:
2. Wall outlet has power
Test Outlet with a different Devices: Try using a working lamp or phone charger etc to test the outlet
Check the Wall Outlet Breaker Box for a Tripped or Off Breaker:
A good short video:
Another Video:
3. Check the Machine Estop
Check that the Estop is not pressed. Give it a clockwise twist
4. Machine Main Breaker
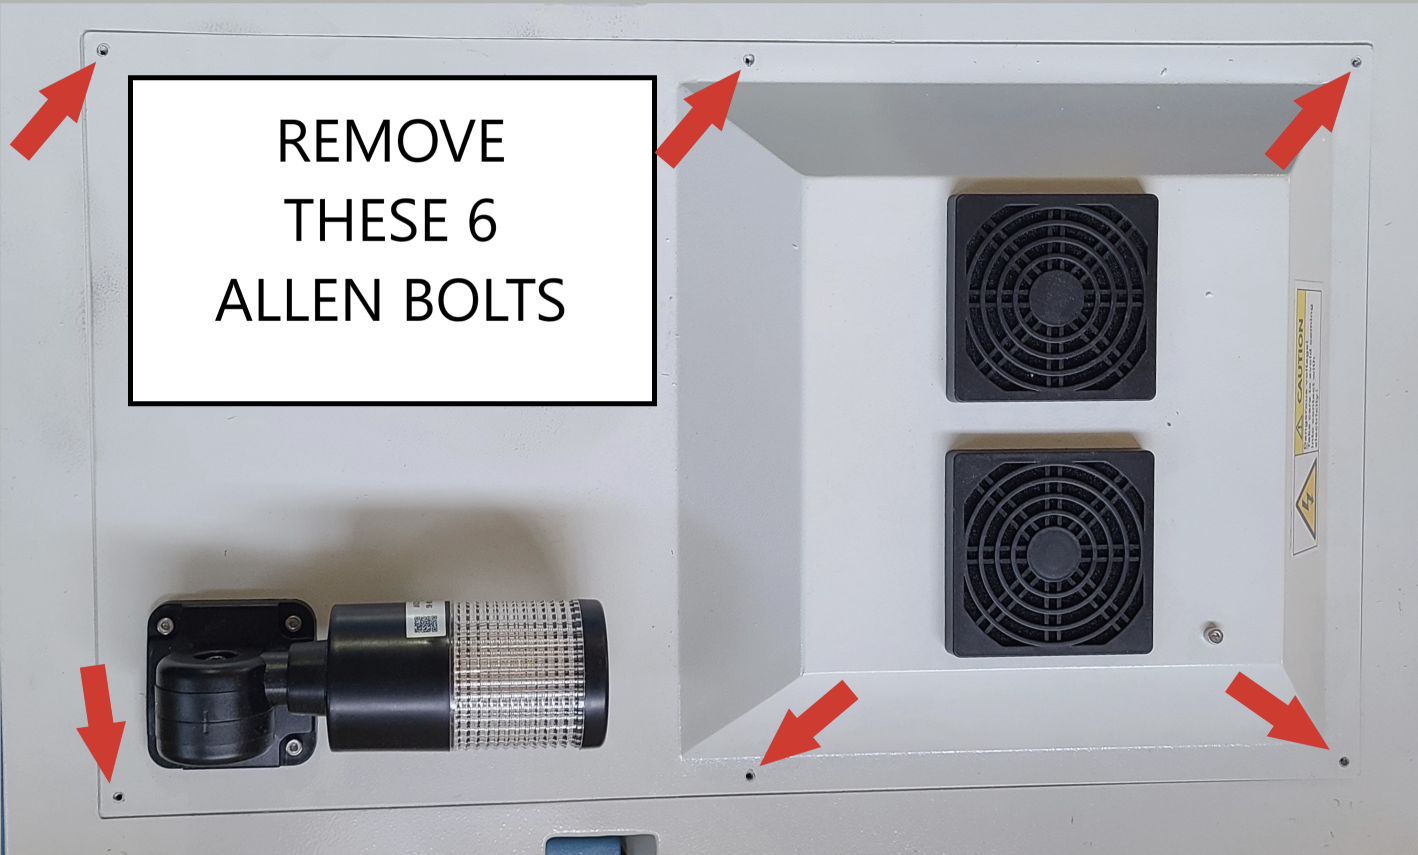
Open up the top lid of the machine using the included Allen wrenches.
Remove the 6 bolts circled in the image below:
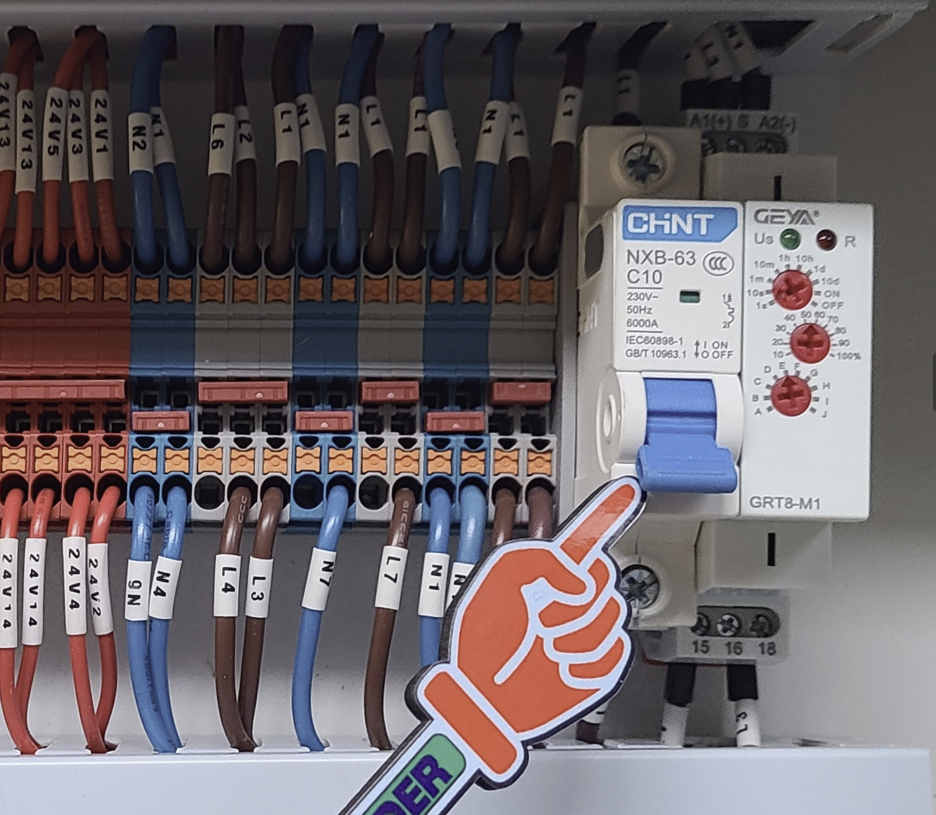
Inspect that the Main Breaker is in the ON position:
Off position: Green Rectangle on the Breaker and the blue Tab is down
If it is in the on position, return it to the On position
On Position: Red Rectangle on the Breaker and the blue Tab is UP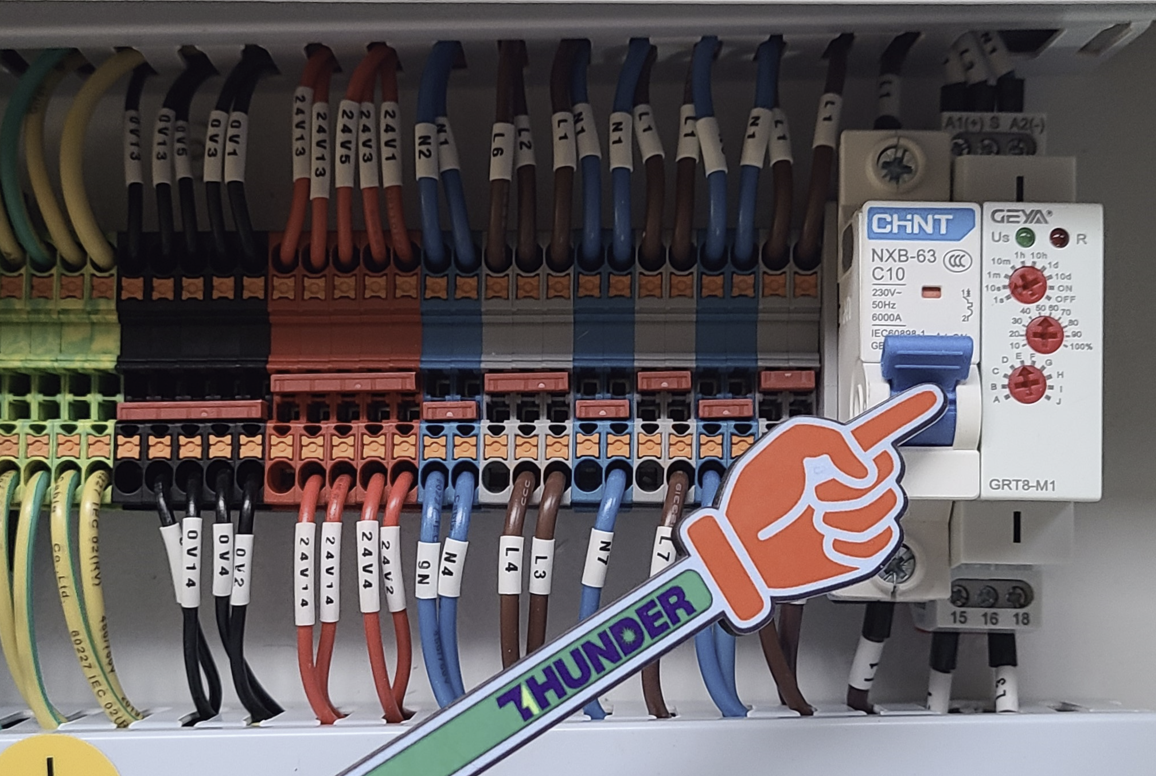
5. Device Lights on Machine
Check for Lights on the control devices in the upper control panel.
Knowing which lights are or or off can indicate where power is reaching and based off the status of other devices on the machine (plug, estop, breaker) further conclusions can be drawn. If you are unable to get the machine powered up, take note of the lights and pass that information onto the support team.
Main Panel: Machine has no Power and No Lights:
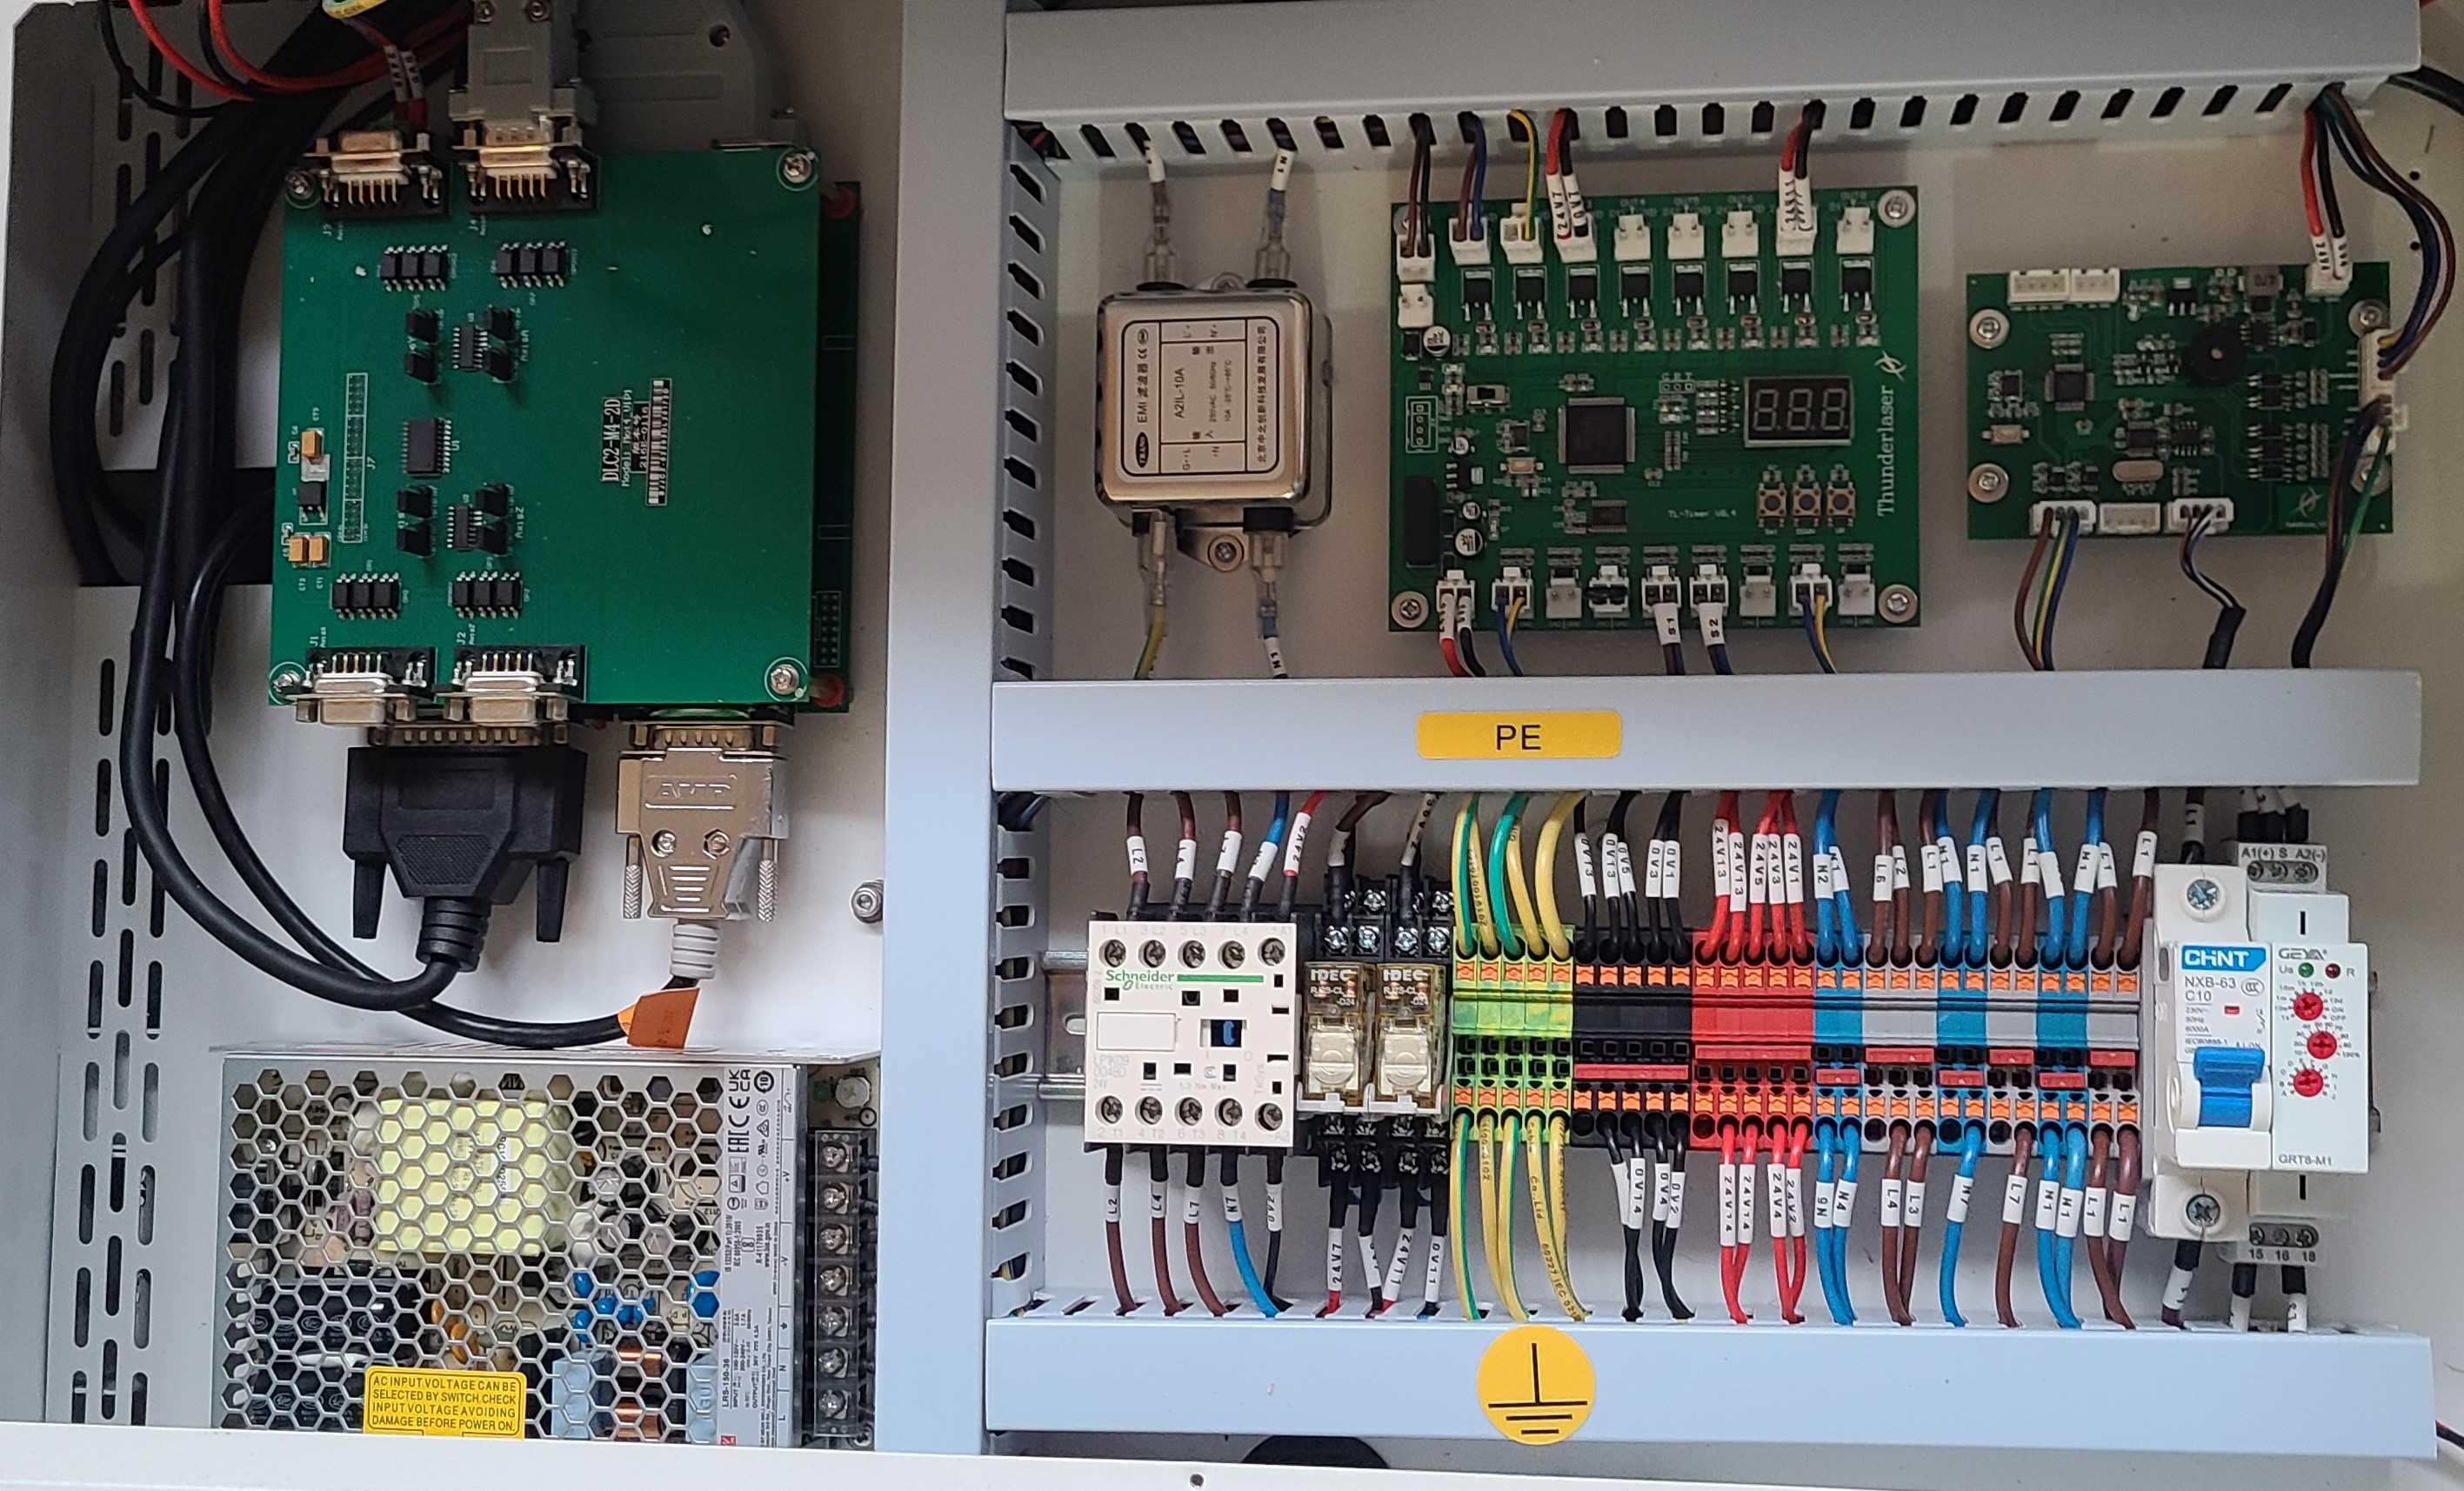
Main Panel: Machine has Power but Main Switch is OFF:
Red Light on Far Right Device is off, but the green light is on
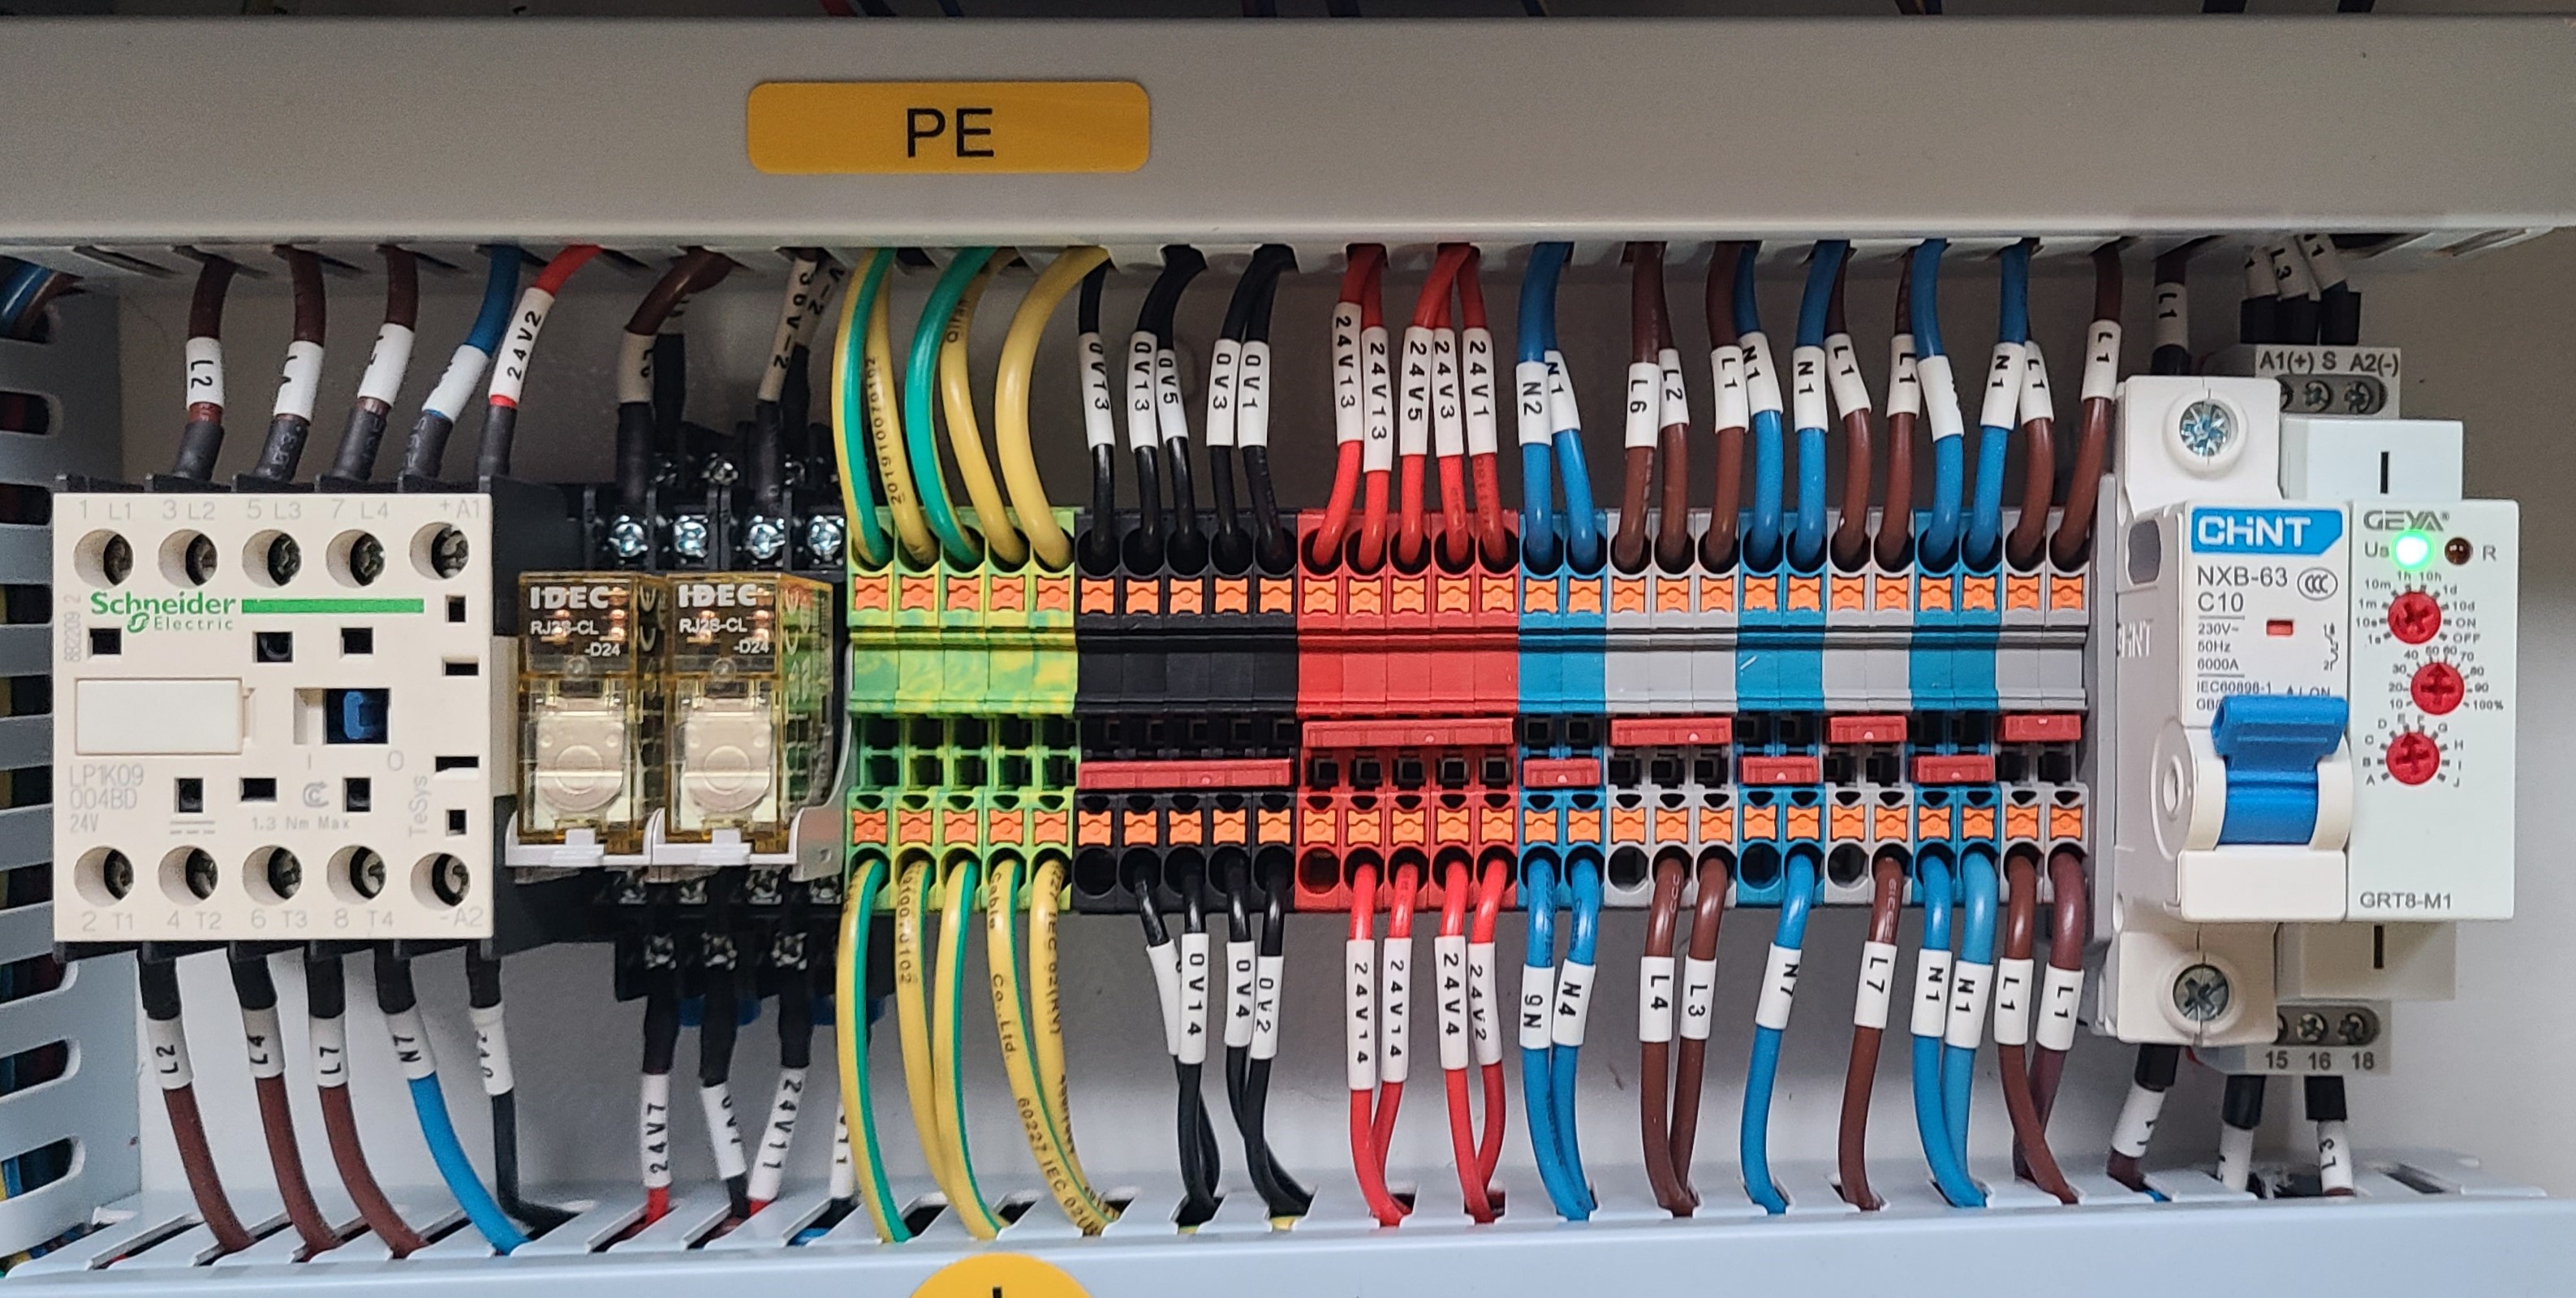
Main Panel: Machine has Power and Main Switch is ON:
Red Light on far Right device is now off
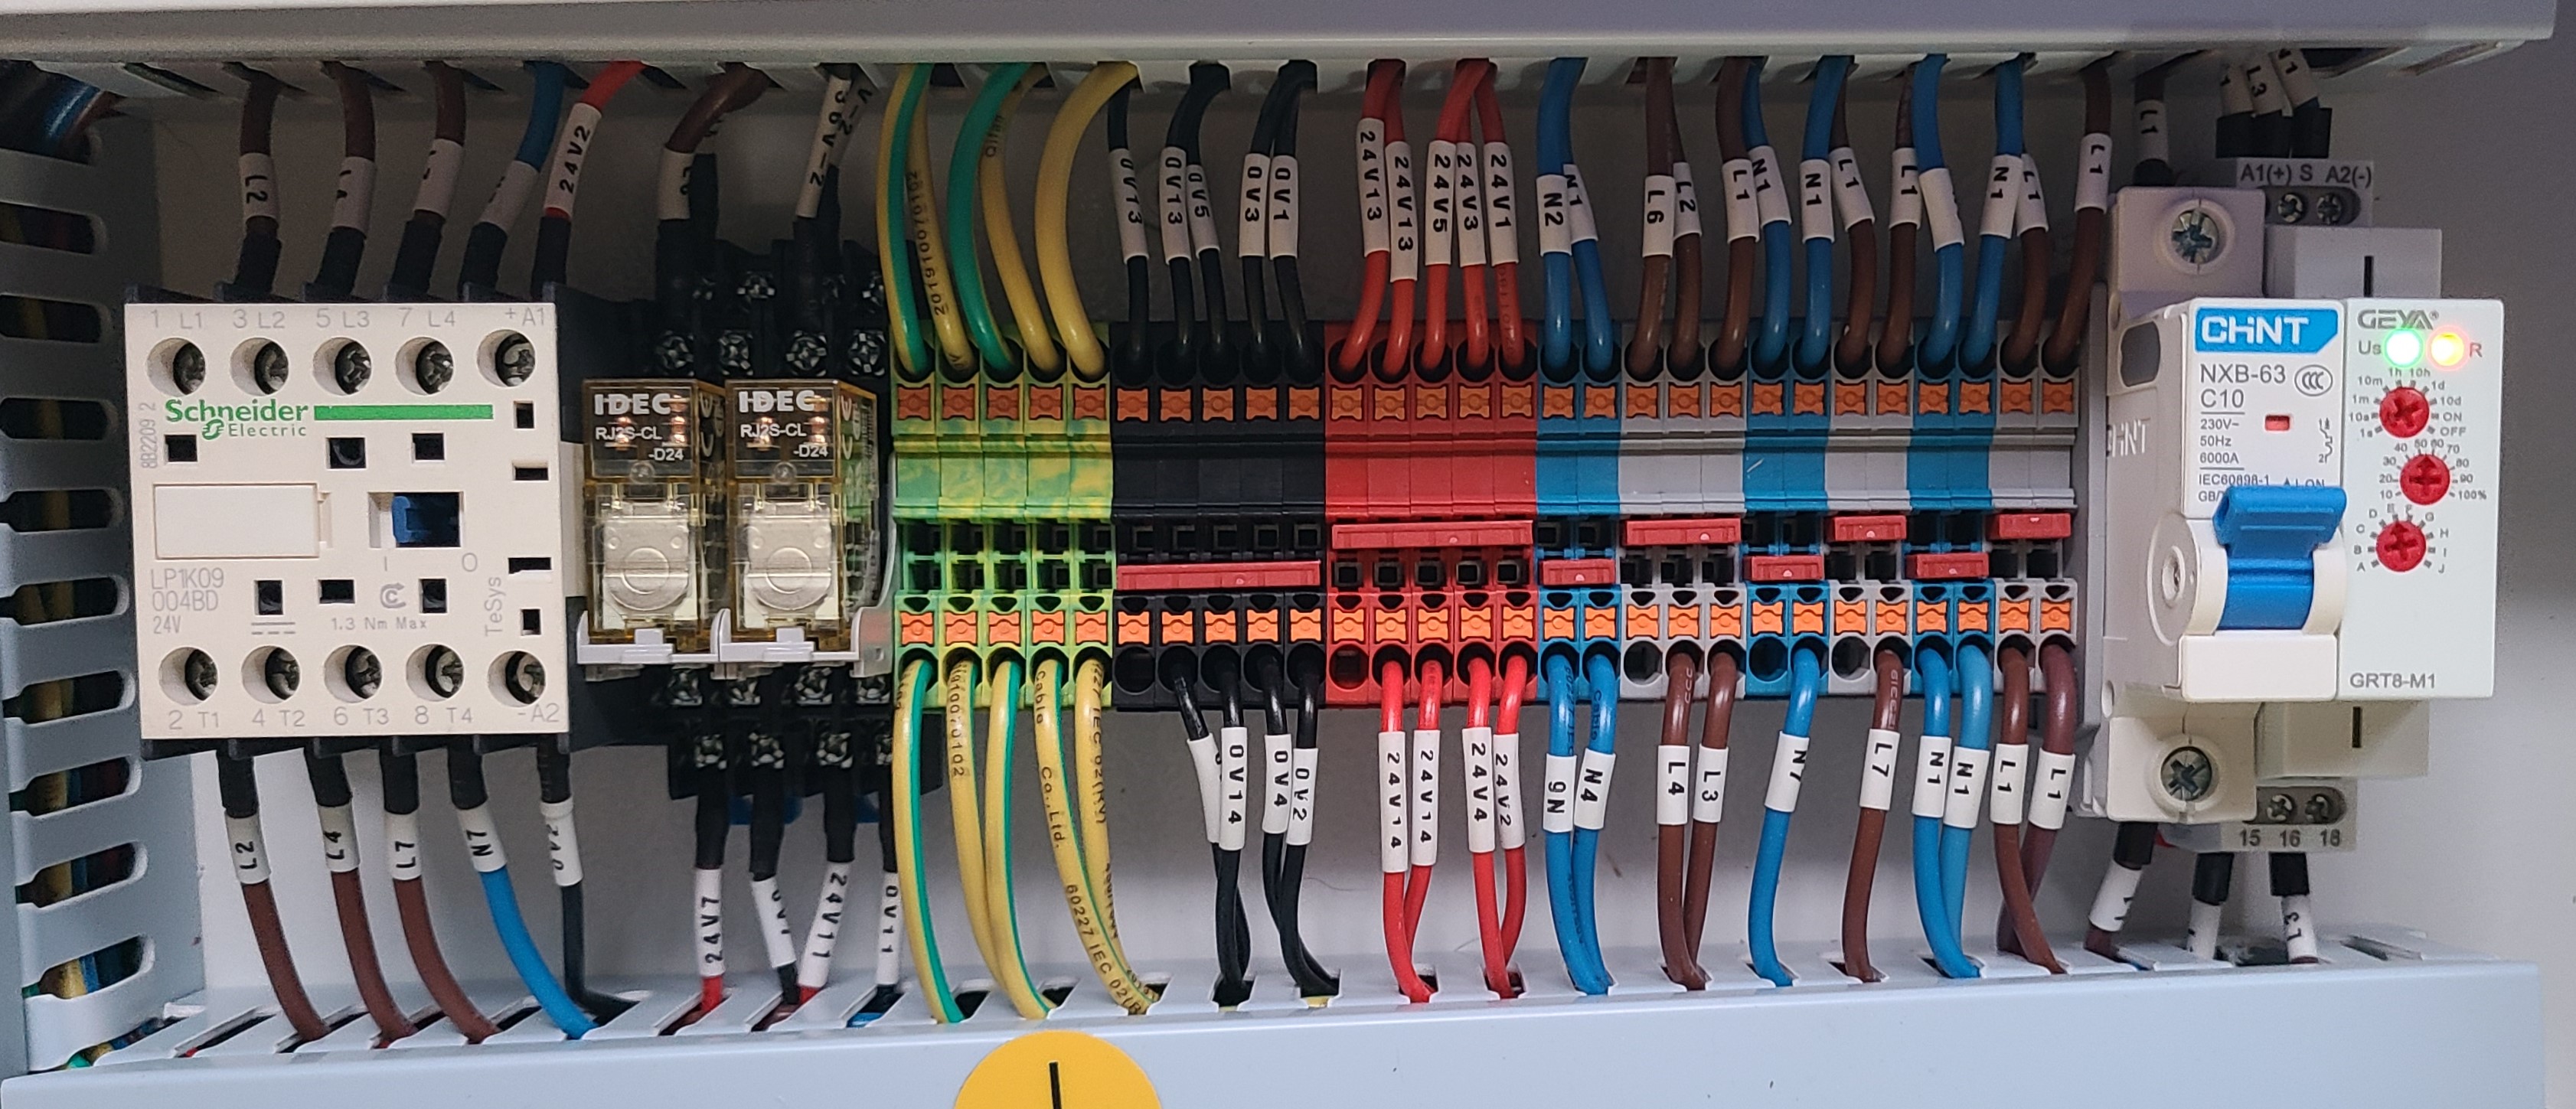
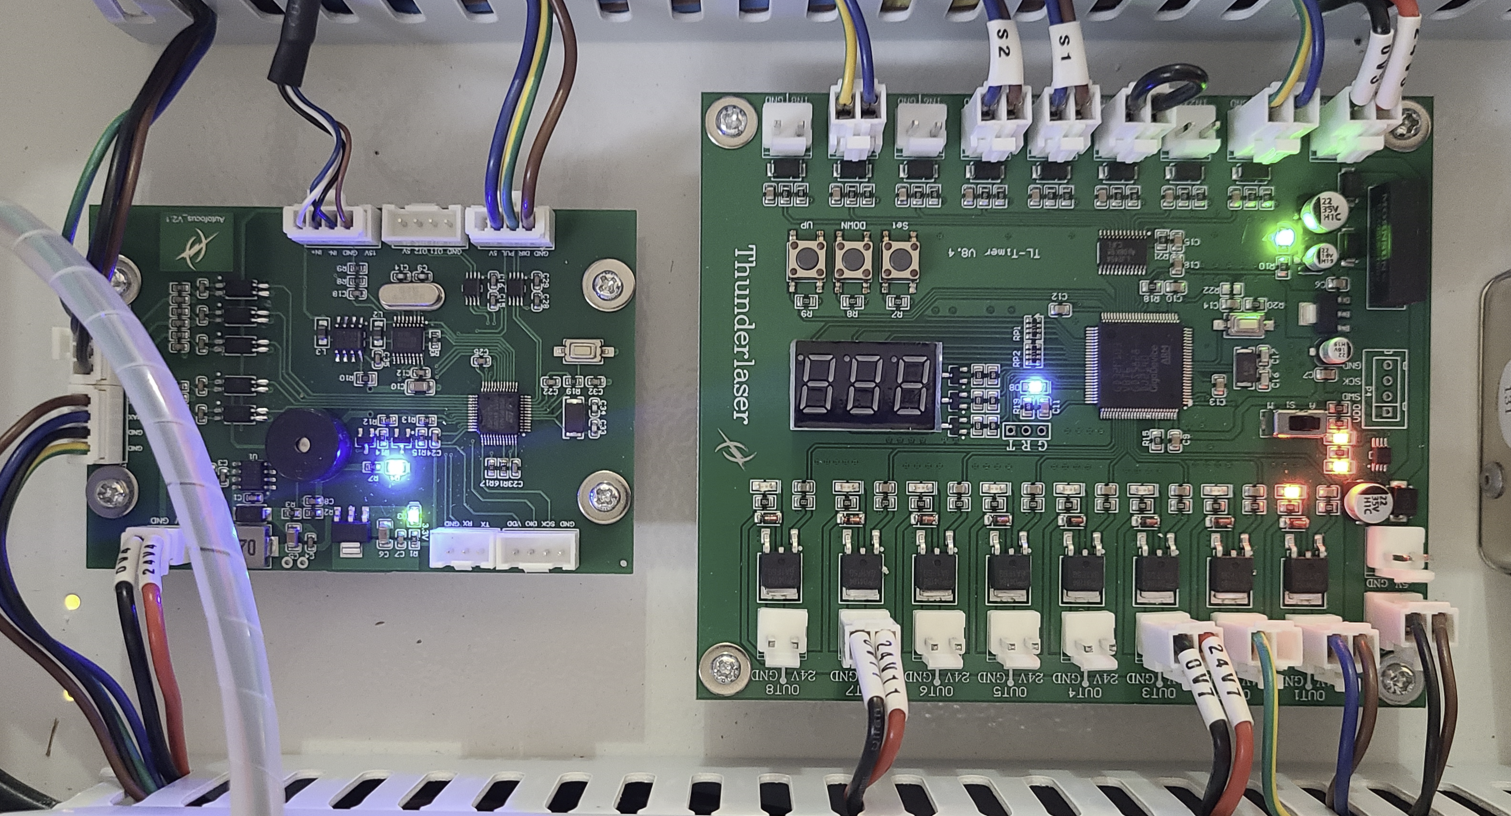
Lights on other devices:
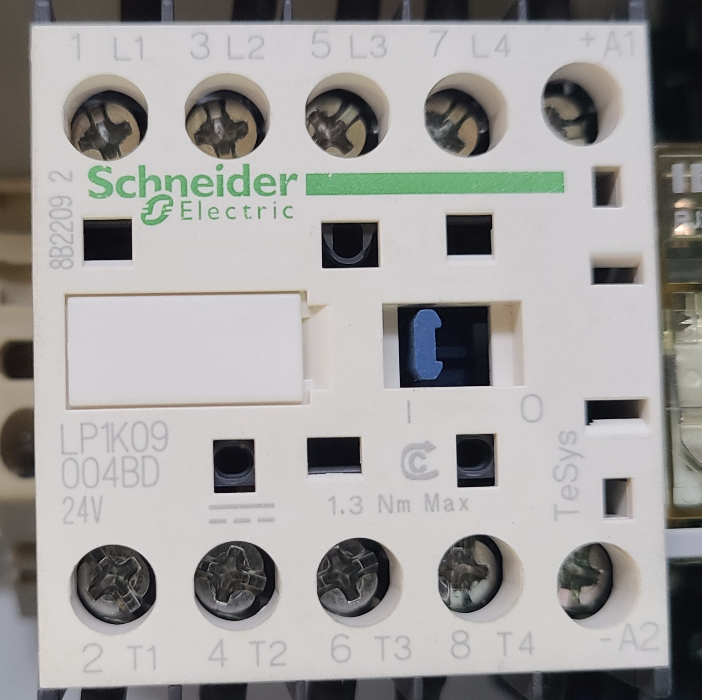
Main Panel: Machine has Power and Main Switch is ON but Estop is Pressed:
Blue Tab on Main Contactor will be to the Left
Power Indicating Green LED(upper right corner) will be Off on this Power Supply (Lid Fans will also be off)
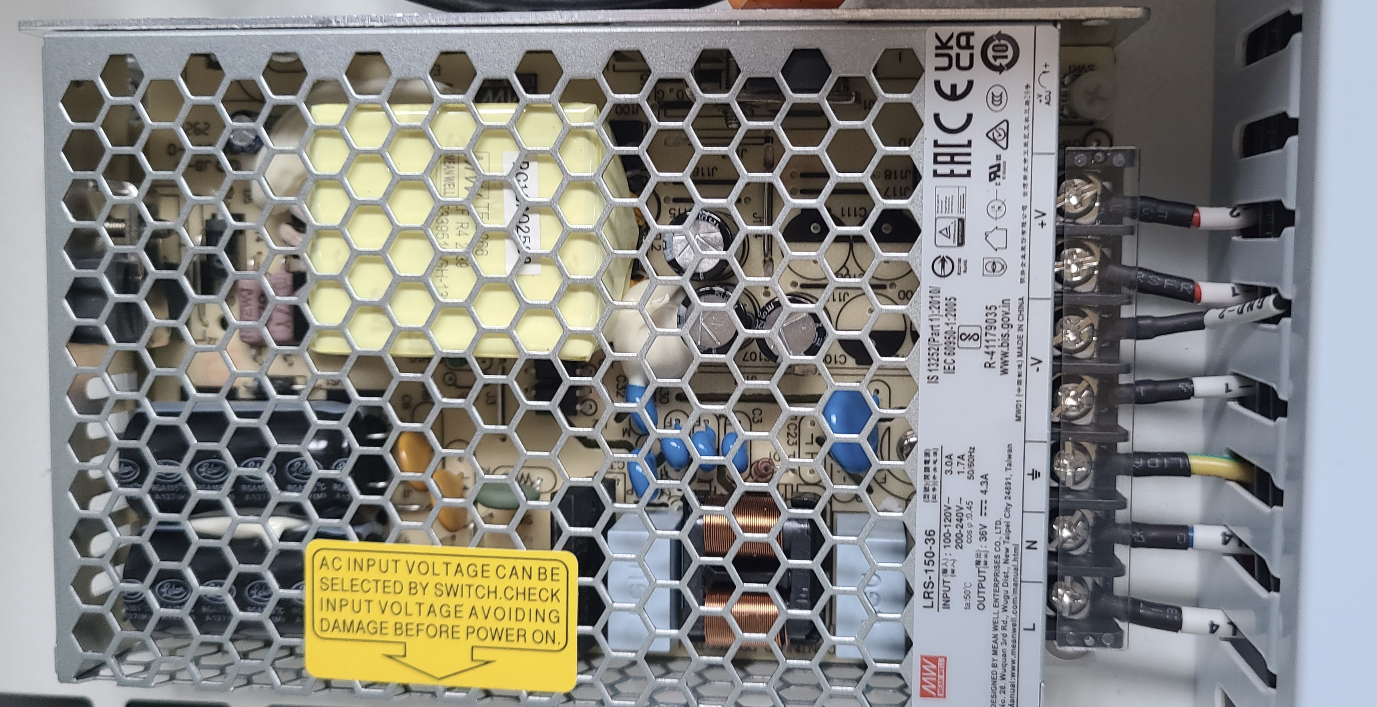
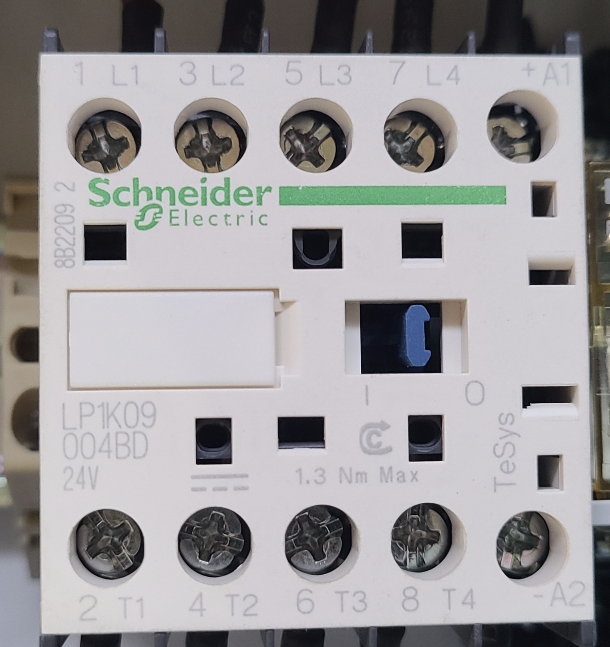
Main Panel: Machine has Power and Main Switch is ON but Estop is Cleared\Reset\Twisted:
Blue Tab on Main Contactor will be to the Right
Power Indicating Green LED(upper right corner) will be On on this Power Supply (Lid Fans will also be On)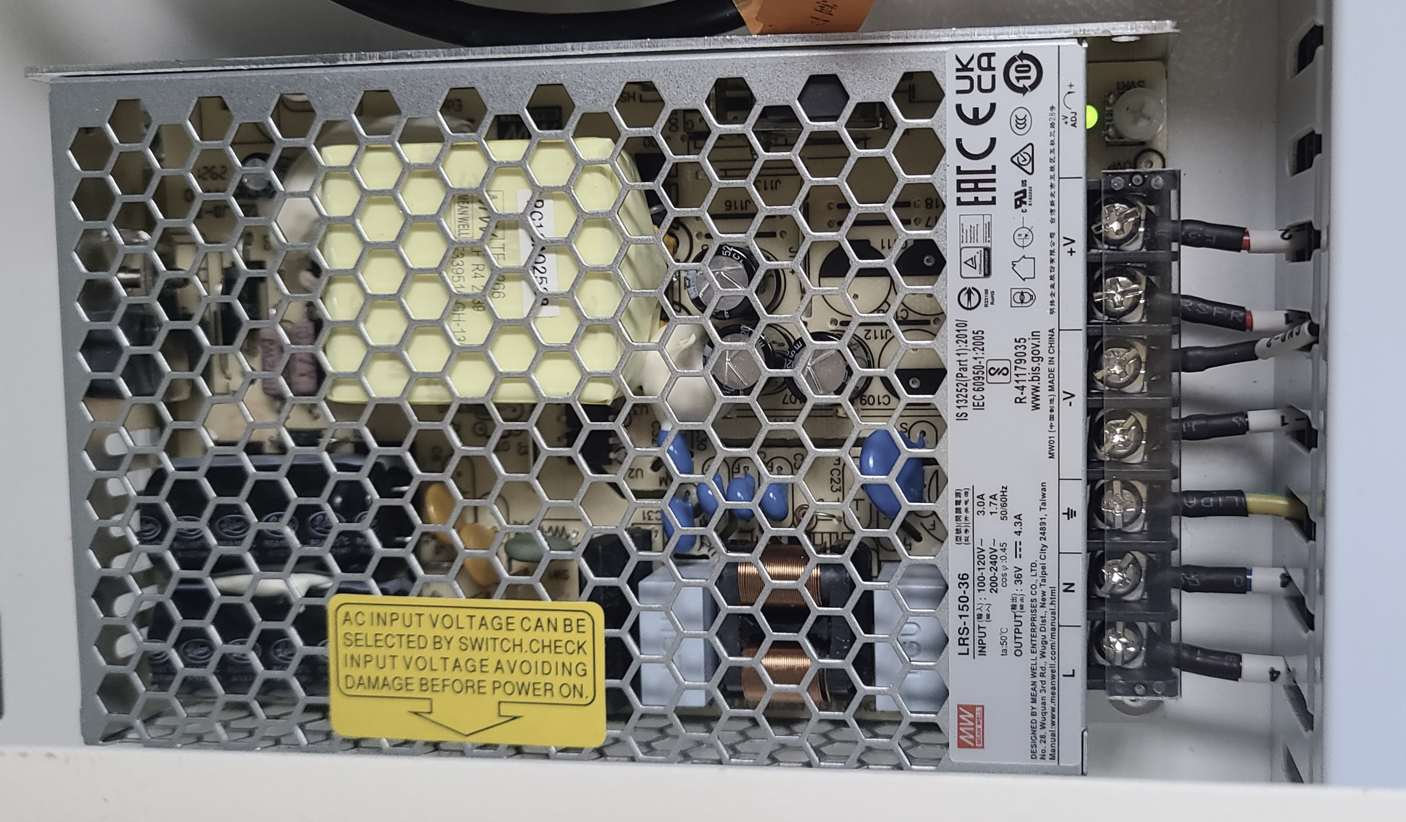
If you are unable to get your machine powered up after following all of the steps above, please email
support@thunderlaserusa.com
Related Articles
Aurora Series Unified User's Manual
Please see the manuals for both Aurora series V1 and Aurora series V2 attached below Note that the manual is Windows and Ezcad centric due to being the GLOBAL manual. Thunder Laser USA has compiled information on Lightburn, Windows and MacOS in this ...Thunder Laser Aurora Lite User Manual
Attached is the latest manual, dated Jan 2025.Aurora Series Getting Started
Aurora Series Getting Started Introduction: So you just bought a new Thunder Laser? This guide will help get you up and running. We will cover topics that you should complete Before the machine arrives and After the machine arrives. This guide will ...Laser Engraver Certifications and Classes
This info is for educational use only and we are not liable for any inaccuracies, etc... This is for reference only. As of the publication of this article, the info below was the most up to date and relevant we could find, but we cannot guarantee the ...How to calibrate the Focal Distance on a Thunder Aurora 1.0 Pro or Aurora 2.0 Galvo Laser with Windows
Preface: This article covers the use of the Thunder laser auto focus software and some of the basics of setting up the new Lens in EzCad3 or Lightburn. It does not cover the topic of finding the optimum focal distance. Quick Start Video: Complete ...
If you are a Thunder Laser USA client and still need Technical Support after exhausting the resources in the Knowledge Base, simply email support@thunderlaserusa.com and the Technical Support Team will promptly assist you! You can also use the form here.
Information contained in this Knowledgebase, on this page, in this or any other Article etc. is the property of Thunder Laser USA and shall not be copied, re-used, sold etc. Do not copy, distribute, or reproduce without express written permission from Thunder Laser USA.